Voice Vox引擎实现QQ语音机器人
该教程目标为在Window/Linux平台搭建一个能够使用Voice Vox合成声音并自动发送语音消息的QQ机器人。QQ用户在群里发送指令以及需要朗读的文字,机器人能够根据文字内容生成语音消息并发送至QQ群中。
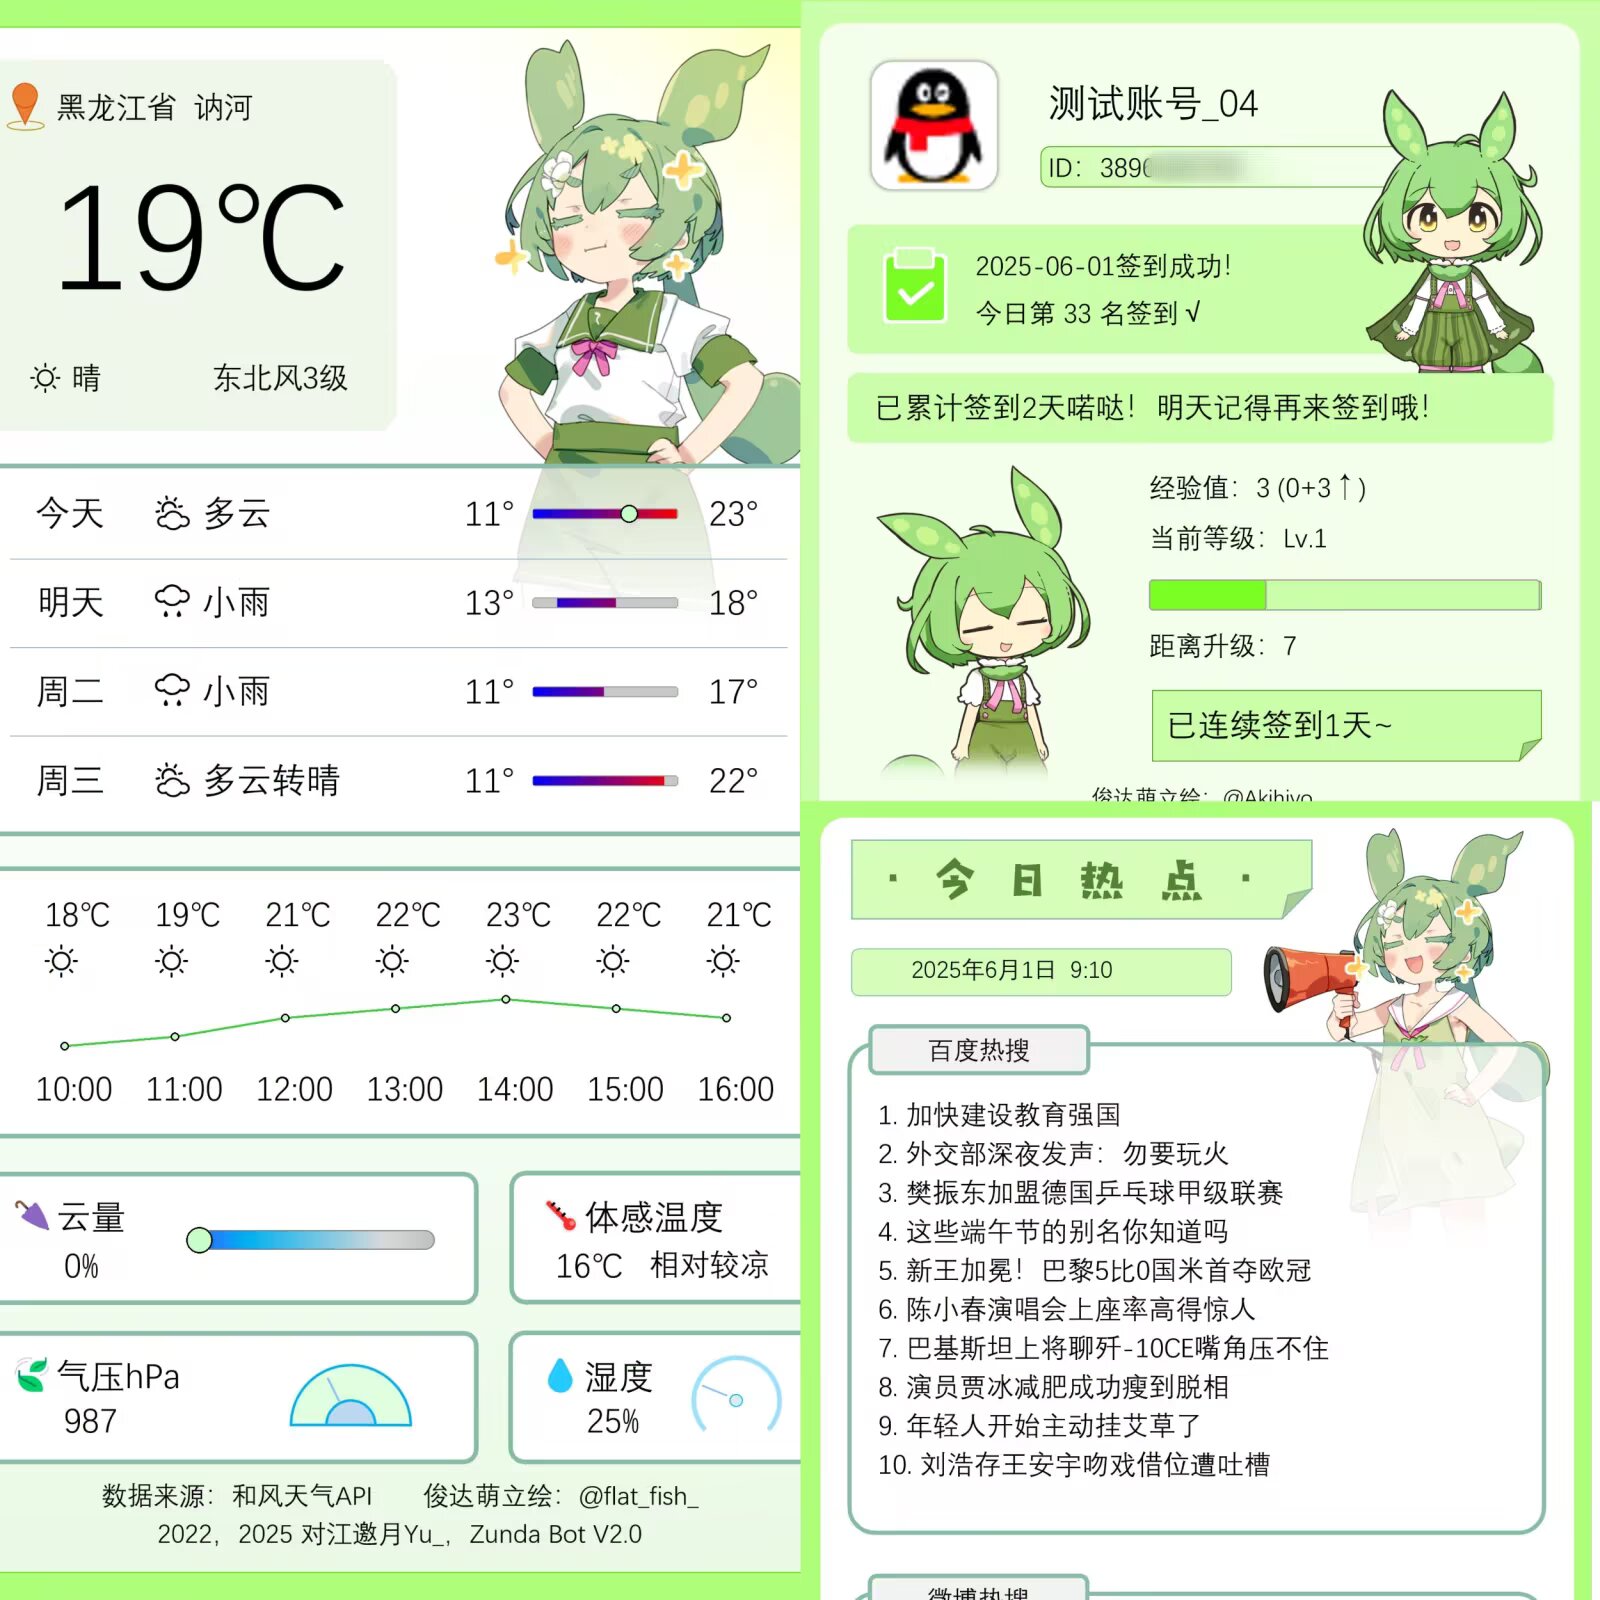
实现效果如下:
【1】前期准备
一.运行平台
Ubuntu20.04发行版
二.软件下载
1.安装Python3.11
2.下载Voicevox Engine引擎(Linux版)
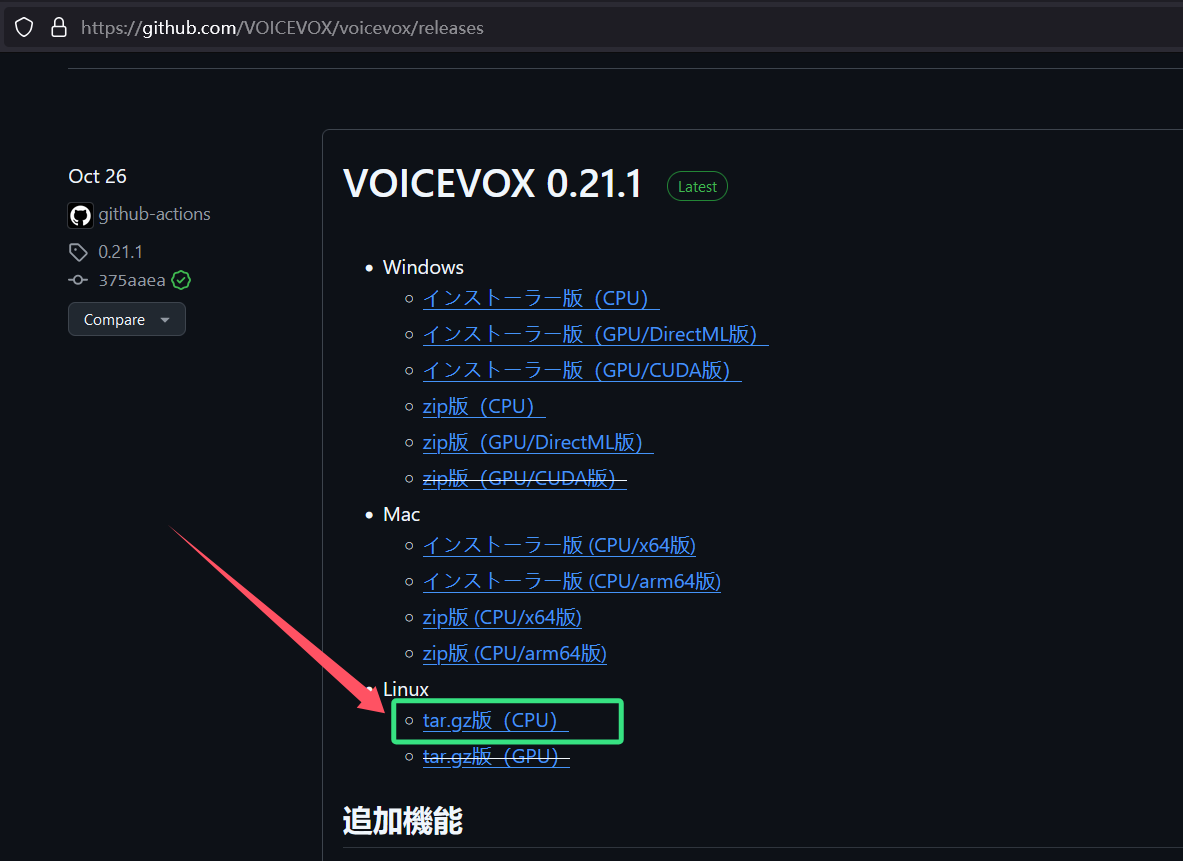
打开下载链接网页:https://github.com/VOICEVOX/voicevox/releases (如果访问缓慢可以使用Watt toolkit加速器给Github加速)
点击Linux下方的”tar.gz版(CPU)“即可开始下载
3.下载Lagrange.Onebot 机器人协议端
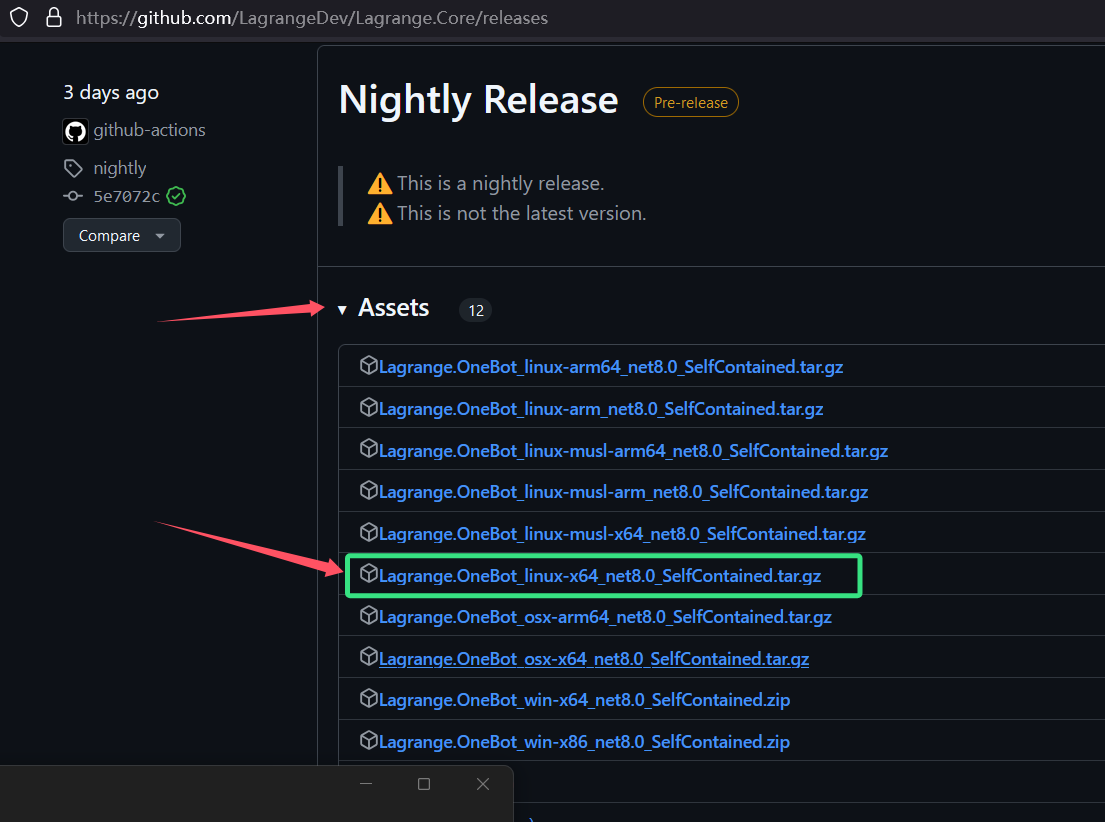
打开下载链接网页:https://github.com/LagrangeDev/Lagrange.Core/releases|
点开”Assets“展开下载链接列表,选择”Lagrange.OneBot_linux-x64_net8.0_SelfContained.tar.gz ”即可开始下载
【2】Voice Vox引擎安装与运行
下载tar.gz压缩包后,上传至服务器,解压
1 | tar -zxvf voicevox-linux-cpu-0.21.1.tar.gz |
进入解压后的目录,进入其中的vv-engine文件夹,执行./run 运行Voice Vox引擎
1 | cd vv-engine |
控制台出现该画面为Voice Vox引擎已开始运行

【3】机器人框架的搭建
1.运行Lagrange.Onebot 机器人协议端
解压此前下载的Lagrange.Onebot压缩包,解压后进入目录,一直进入到存在“ Lagrange.OneBot”这个二进制文件的目录,执行这个二进制文件。
1 | tar -zxvf Lagrange.OneBot_linux-x64_net8.0_SelfContained |
启动后将显示如下的二维码:

使用手机QQ扫码登录,登录成功后手机QQ界面上方会显示“已登录 Linux”,至此协议端搭建完毕。
2.搭建与运行NoneBot机器人框架
首先需要安装Python(推荐3.8版本以上):
1 | sudo apt update && sudo apt upgrade -y |
安装NoneBot框架的python包:
1 | pip install nonebot2[fastapi] nb-cli |
创建bot运行目录,后续在此目录创建NoneBot项目:
1 | mkdir Bots; cd Bots |
创建NoneBot项目:
1 | # 创建项目 |
template to use 选择第一个bootstrap
ProjetcName设置为ZundaBot(或其他名称)
adapter选择OneBot V11
driver选择fastAPI
Install dependence选择 Y
Create virtual environment? 选择 Y(创建虚拟环境,选择完按Enter后会下载一些东西)
builtin plugins选择echo
如下图:


至此,NoneBot项目创建完成,使用nb run启动QQ机器人:
如下图所示,并且可以接收群消息

至此,QQ机器人框架搭建完成。
【4】实现Voice Vox语音功能
在上一步的目录创建文件夹“ZundaBot”并进入,在这里创建一个文件夹“voices”,用于临时存放语音文件。
再创建一个文件夹“plugins”,在此目录下存放实现机器人功能的python文件。
1 | mkdir ZundaBot; cd ZundaBot |
目录结构如下:
1 | Bots |
在pyproject.toml中把plugins路径添加到plugin_dirs中
1 | vim pyproject.toml |

安装voicecvox_python包:
1 | # 创建Bot时创建了虚拟环境,在此虚拟环境中安装voicecvox_python |
在plugins目录创建voice.py文件,文件内容如下(注意修改Path路径):
1 | import io |
退回到第一个ZundaBot目录,在此启动Bot:
需保证Voicevox Engine引擎和Lagrange.Onebot 机器人协议端已在运行
1 | cd ../.. |
voice.py加载成功则显示如下:

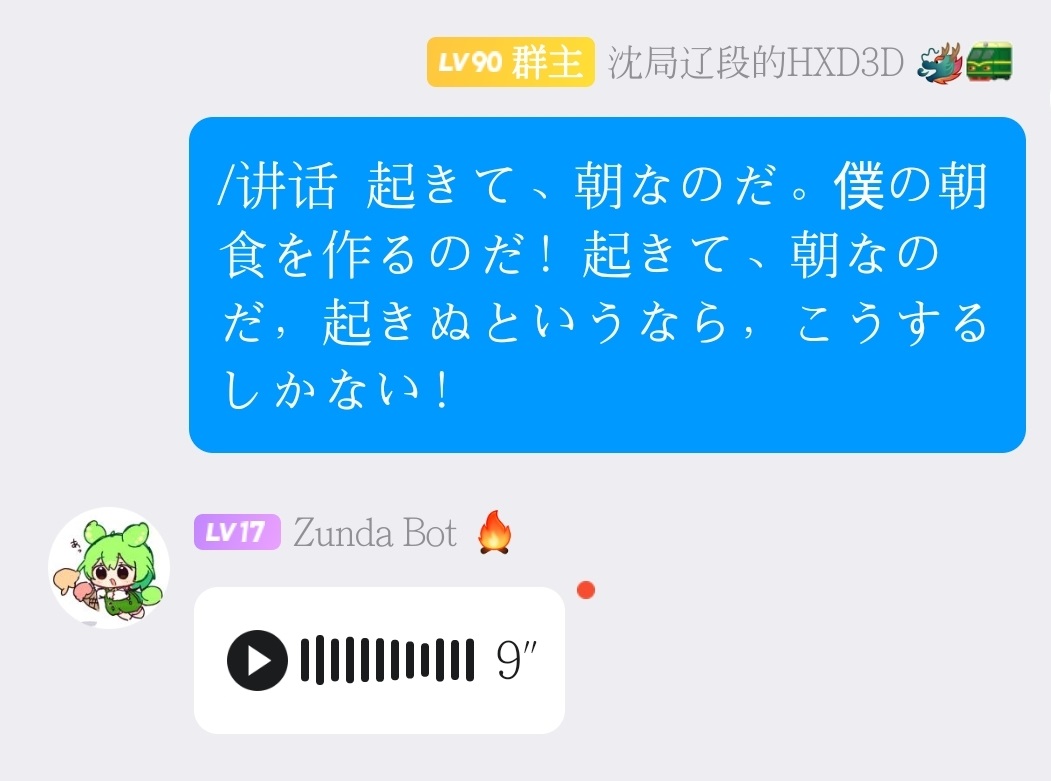
在群聊中发送命令:/讲话 じにたいめい,可收到如下的语音消息:

至此,已完成Voice Vox QQ语音机器人的实现。
——————————————————————————————————
更新于2025.8.15,辽宁省大连市。